Pocket HRMS has always been committed to consistent improvement. This April we present you our latest updates that will improve your user experience further.
1. Month Wise Joining Dashboard
The month-wise joining chart in Pocket HRMS provides a visual representation of the number of new employees who joined the organization every month in graphical format.
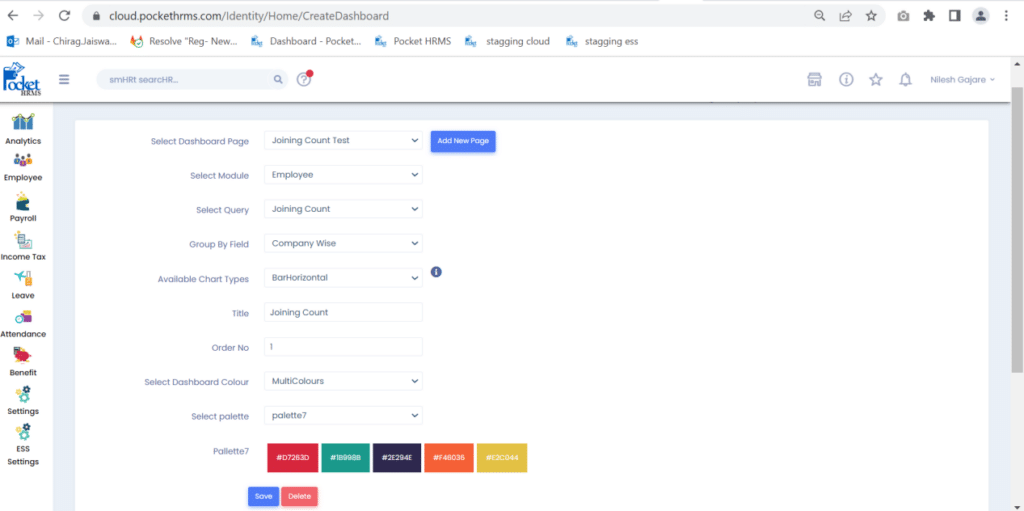
Path: Analytics > Create Dashboard > Select the Settings as Shown Below
Once the setting is selected click on the ‘Save’ button. Now you can open it by selecting the Dashboard’s page name in the ‘Analytics’.
2. In Data Wizard- Addition of Fields
In the Data wizard, we added 3 new fields, where we can find employees by
- Last Incremented Date,
- Apply Month of Last Incremented Date and
- Effective Date
The User can download all incremented data through the ‘Increment Register’.
Path: Analytics > Data Wizard > Select Existed setting or create New setting for the same > Report type i.e., Master Report or Monthly Report > Add Fields > Master Fields and select below fields.
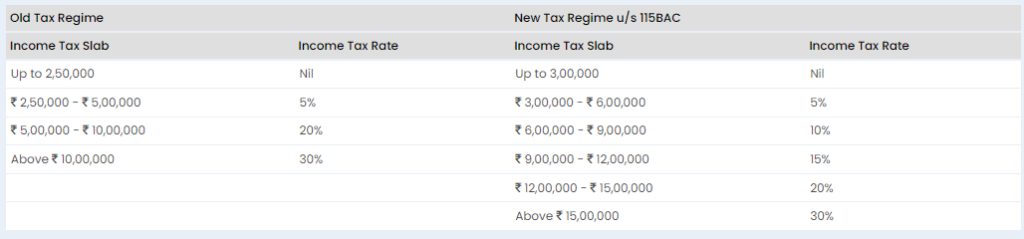
3. Payroll Optimized with FY 2023-24 Budget Changes
- The default Tax Method is now the New Regime for FY 2023-24
Note: Employees can change their default tax method from the declaration page under ‘My Tax Details’ in their employee profile on ESS Portal.
- Inclusion of a Standard Deduction of Rs. 50,000 in the New Tax Regime
- Tax Rebate 87A is increased to Rs. 7,00,000 in New Tax Regime whereas Old Regime Tax Calculation is the same as per the previous FY
Path: Cloud > Income Tax > Tax Section > Tax Surcharge Slab
- Selection of New Regime
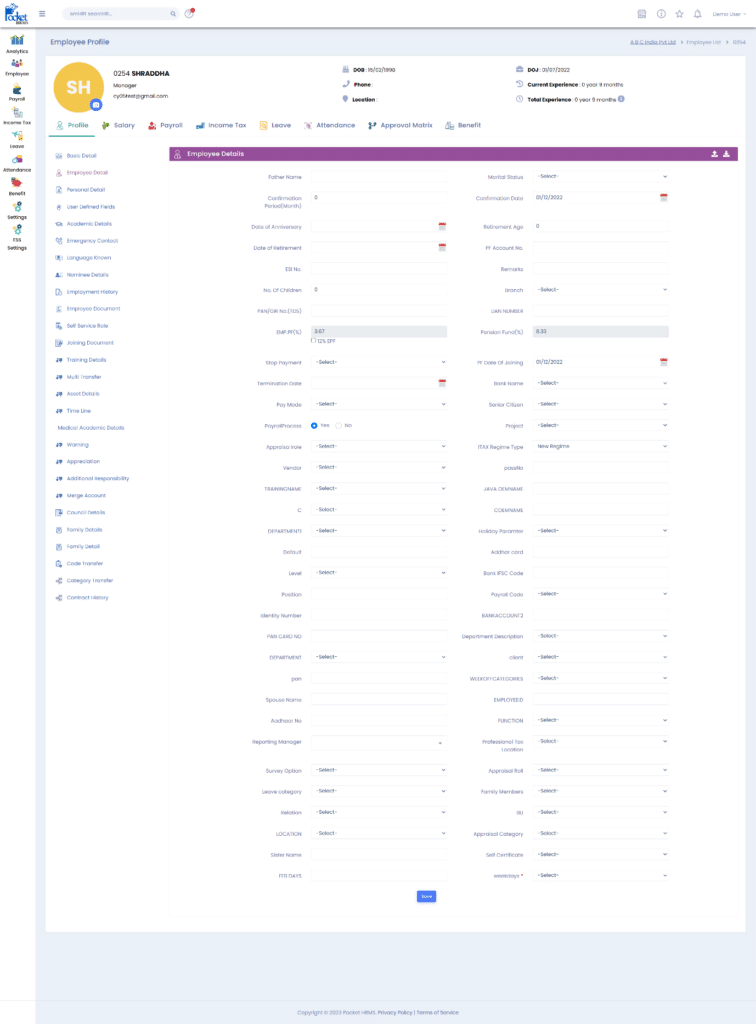
Path: Cloud> Employee> Employee List> Select an employee>Employee Details > ITAX Regime Type> Select New Regime from the dropdown.
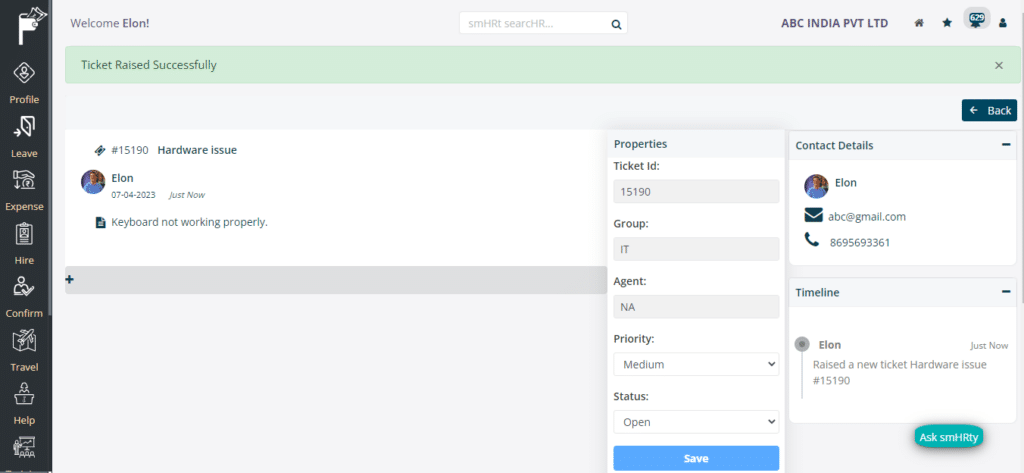
4. Helpdesk UX/UI Modification
When the ticket is created, the user is redirected to the ticket information page as shown below. On this page, the user can change the priority and status of the ticket according to their requirement.
Path: ESS>Help > My Tickets > My Ticket List> Add> Create a ticket
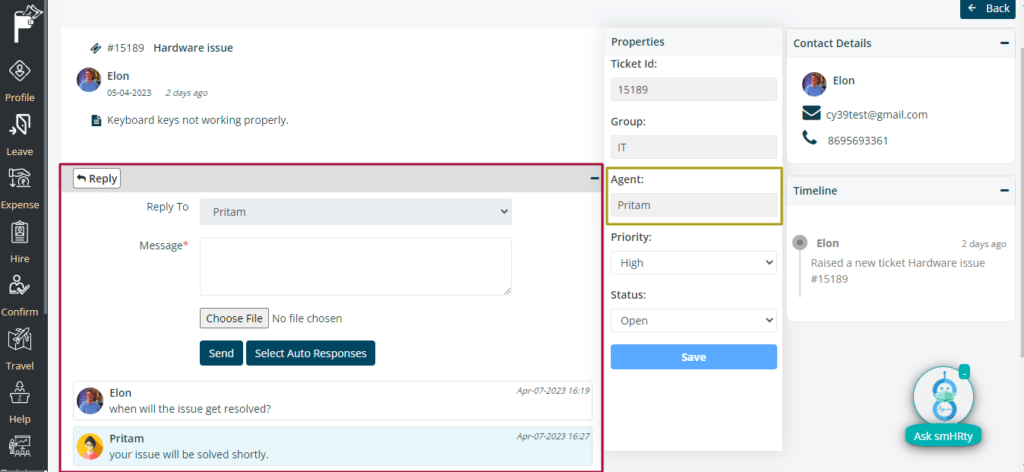
The user can see the agent assigned to the ticket. The user and agent can also communicate with each other regarding the issue.
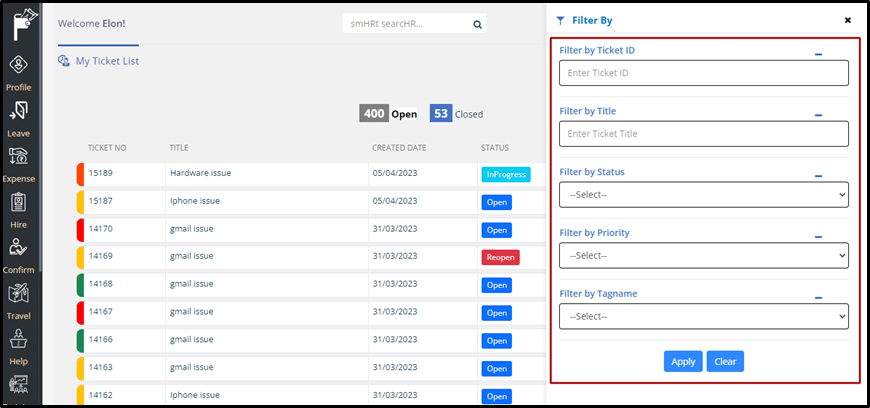
- Coming back to the My Ticket List page, the open tab shows the list of all the tickets raised by the employee. The status will be shown as either open, in progress or reopen. Similarly, the closed tab shows the list of tickets having the status as resolved and closed.
- The user can also filter the tickets using the filter option and get the data according to their requirements such as Ticket ID, Title, Status, Priority, and Tag Name.
Path: ESS>Help > My Tickets > My Ticket List> Filter
5. Bulk Asset Mapping to Employees
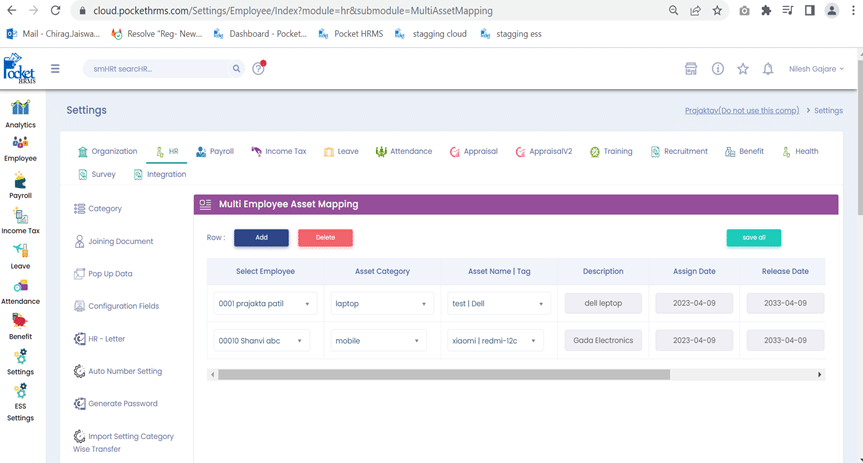
The bulk asset mapping feature in Pocket HRMS allows users to map multiple assets to multiple employees. This feature is designed to save time and effort by avoiding the need to map assets to each individual employee separately. Overall, bulk asset mapping in Pocket HRMS is a powerful tool for HR professionals, allowing them to efficiently manage assets and streamline their workflows.
Path: Settings > HR > Multi Asset Mapping > Select Employee and Asset Category
Note: If it is available, it will fill all the fields automatically. If you have multiple devices in the same category you can select the asset name to write a note for it and click on the ‘Save’ button.
6. History of Assets
- We added new functionality in the employee module in which users would see “Assets History”.
- Existing, we can’t view the history of assets assigned to the employee but now with the help of this enhancement, it would be easy to view the history of assets.
Path: Go to Employee > Employee List > Select Employee > Profile > Asset Details.
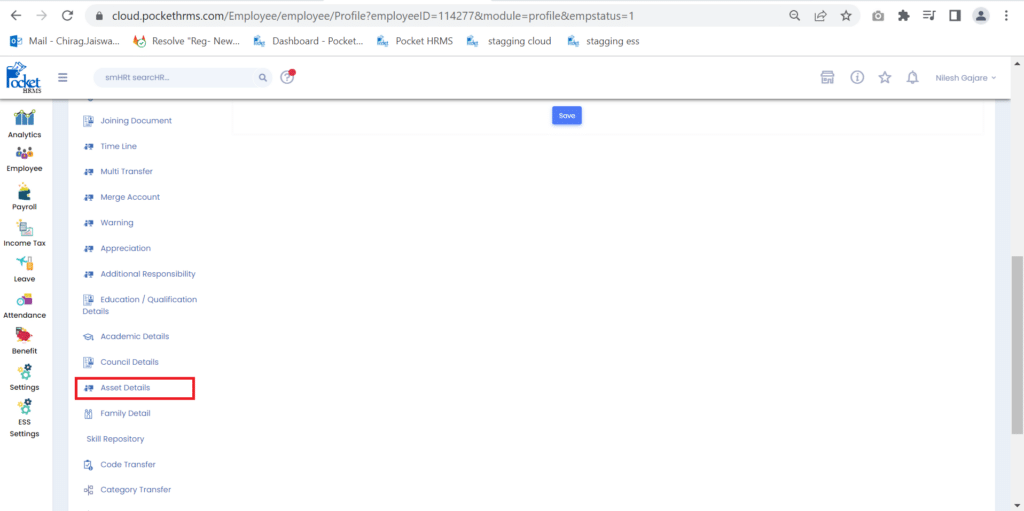
- Click on the Asset History to view employee’s asset history
7. Asset Report in ESS
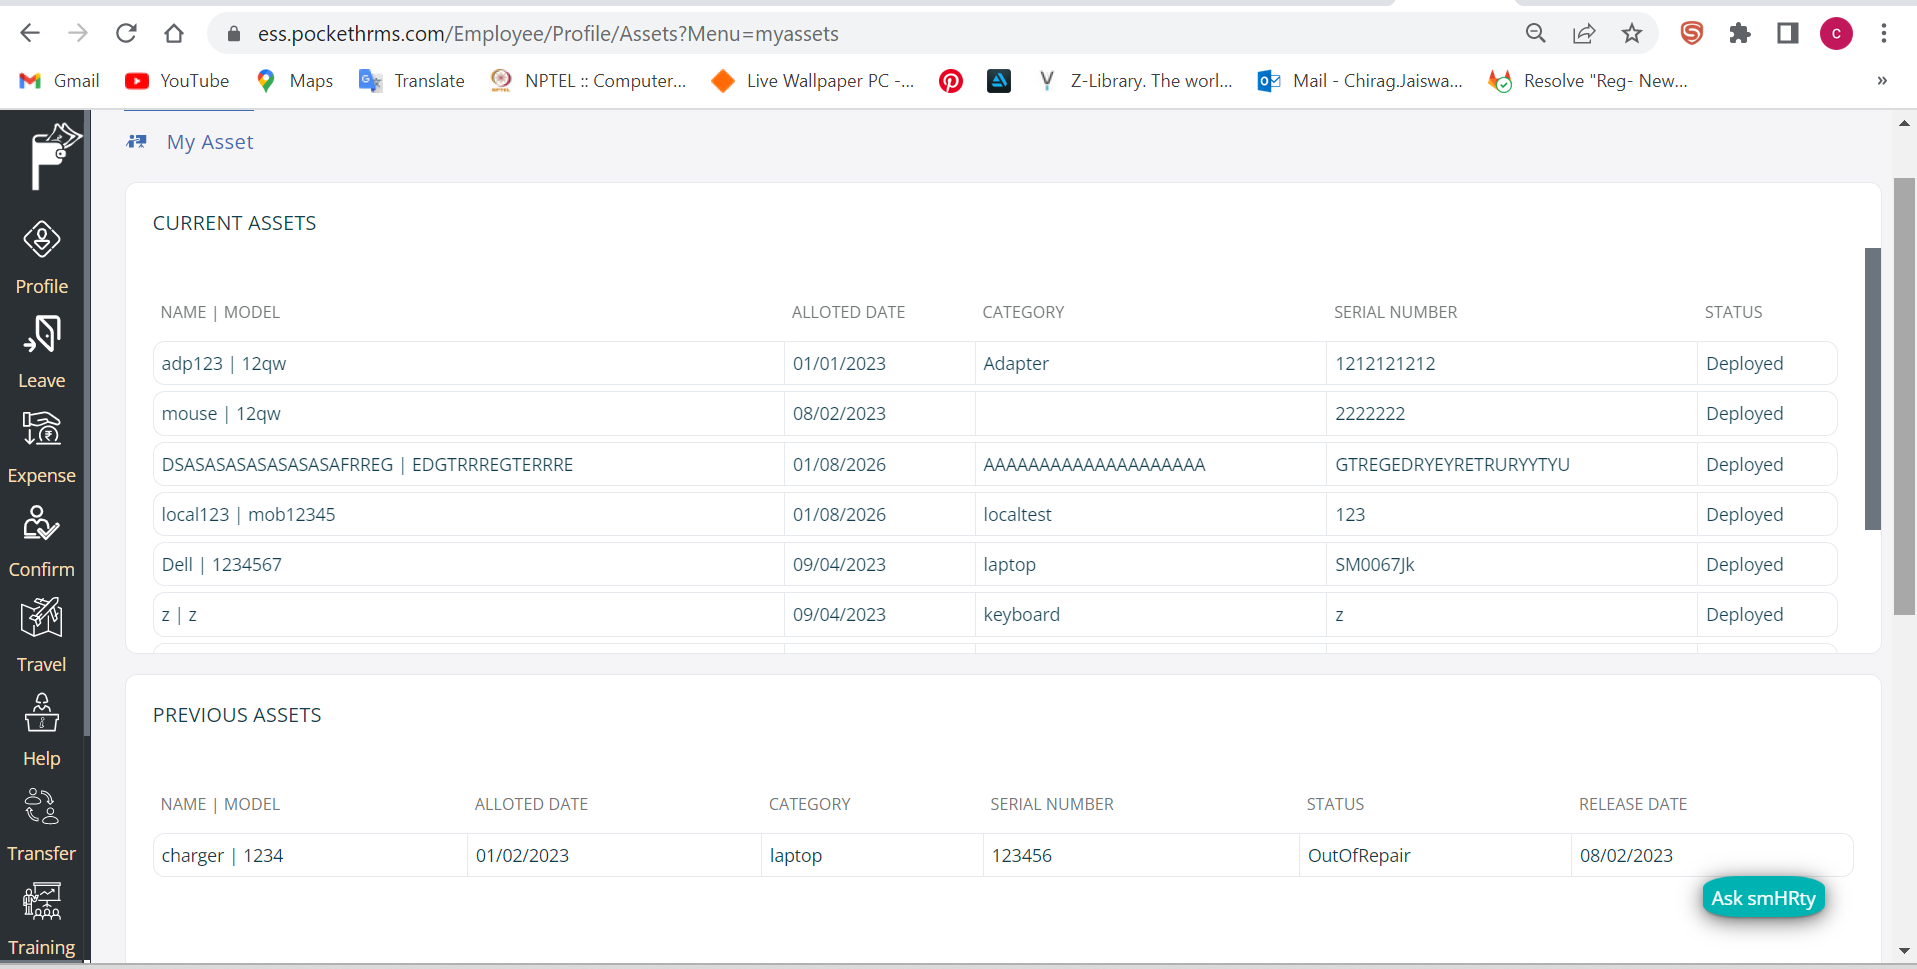
- In this enhancement, the user would be able to view the “Assets Report” in the ESS portal.
- The user would be able to view the current assets and history of assets in the “My Assets” tab which are assigned to the user or had been assigned to him in the ESS portal.
- This will show you the current assets and history of assets which are assigned to the user.
Path: Go to Profile >Assets > My Asset
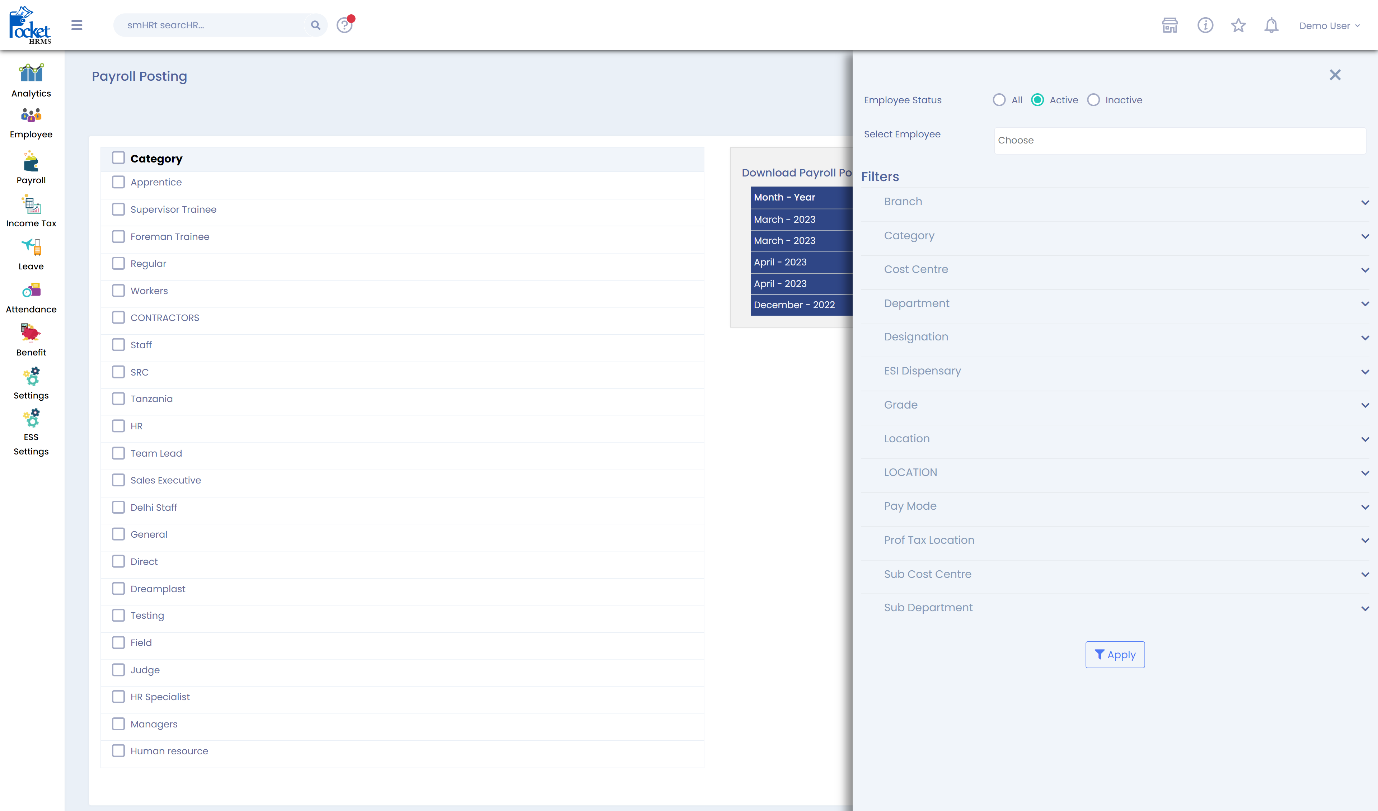
8. Cost Centre wise (Payroll Posting)
- Generic filter added in Payroll Posting.
- Generic Filter options: Employee Status (All/ Active/ Inactive), Choose Employee, Bank Name, Branch, Cost Centre, Dept, Designation, ESI Dispensary, ESI Location, Grade, Location, Pay Mode, Project, ProfTAx Location, Task.
Path: Cloud>Attendance> Utilities> Payroll Posting

9. ESS-Appraisal Enhancement (Approve, Reject)
As a view-only Manager in the appraisal, the user should be able to Review Appraisal form and Approve/Reject it, so that the appraisal is finalized.
- Review Appraisal Settings should be enabled for a review process.
- Approval/ Reject will not impact the current appraisal process as it is for review purposes only.
- Review Approve and reject can only be done after the appraisal process is completed or else the system will give validation.
- Status of the review whether Approve/Reject including remarks will be displayed in the Admin Detailed Report.
- The remark option is optional for both approval and rejection
Appraisal Entries of the employees’ active stage will be displayed on Employee Appraisal Page.
Path: ESS> PMS> Request>Employee Appraisal

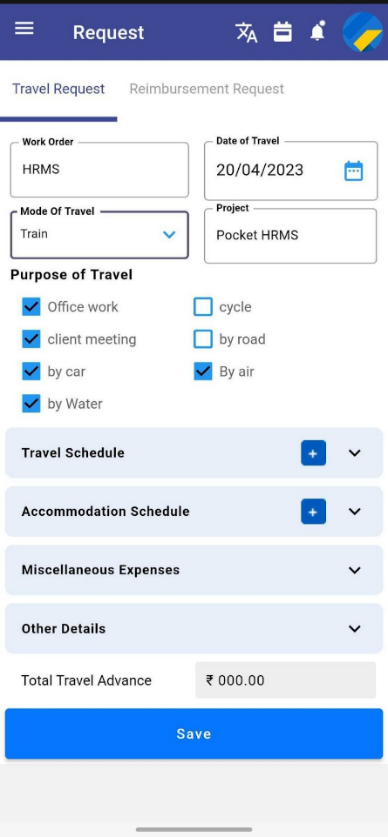
10. Travel Module Now Available in Mobile APP!
The purpose of the Travel Module in the Mobile APP is to enable employees to create travel requests, get them approved, and track travel details like ‘Travel from’, ‘Travel to’, the Purpose of travel, Departure date, Arrival date, Accommodation expenses, Miscellaneous expenses & Other details etc.
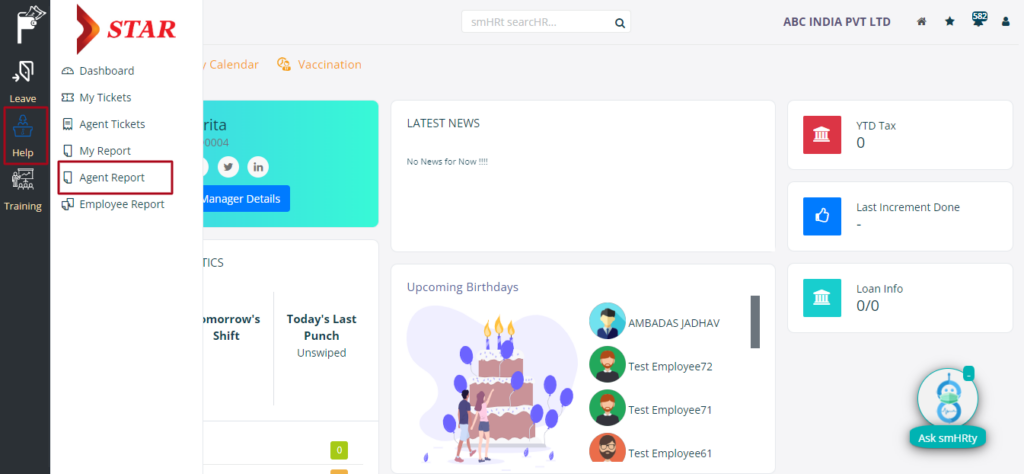
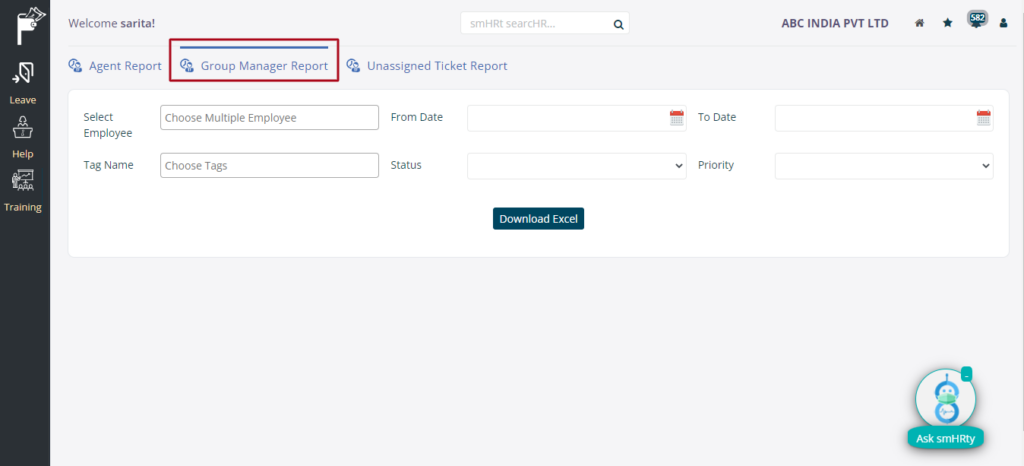
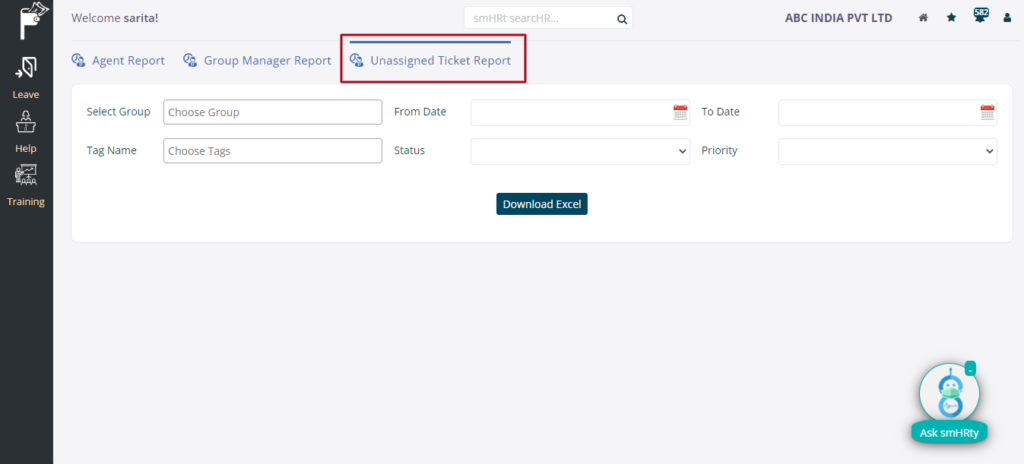
11. Group Manager Report
The group manager can download the reports of all the tickets received in the group. The group manager can also download the reports for all the unassigned tickets by going to the “Unassigned Ticket Report” tab and then applying the required filters.
Path: Help > Agent Report > Group Manager Report
The manager can apply the required filters and the report will be downloaded accordingly.
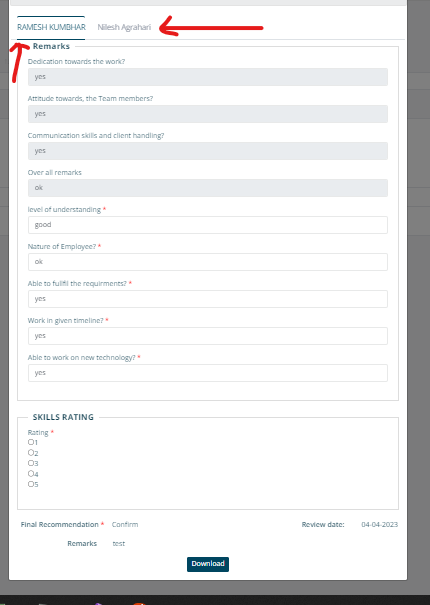
12. Confirmation Module Enhancements
The review and feedback form, (Remarks), Recommendation and date of review from first-level authority are to be shown for second-level authority in confirmation approval.
When 1st level manager confirms the employee and it will go to the 2nd level manager for confirmation. The 2nd level manager will able to view the 1st level manager’s final recommendation and remarks.
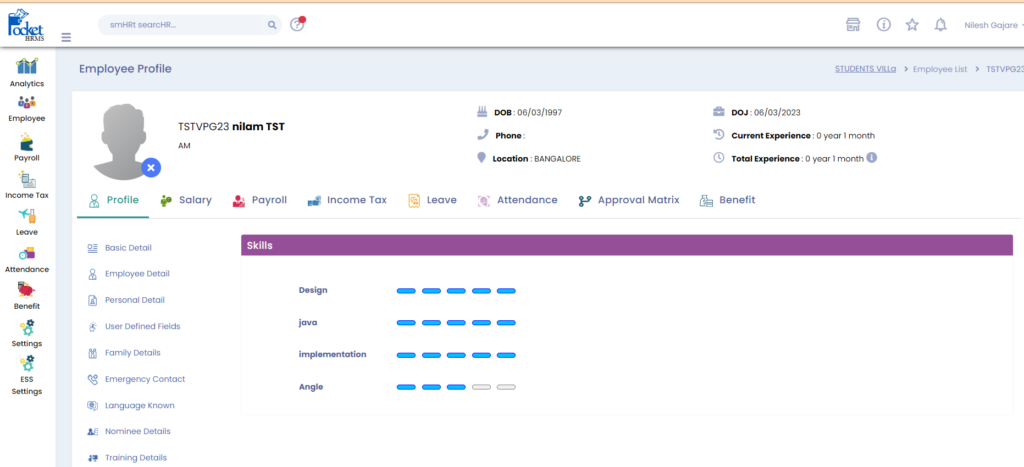
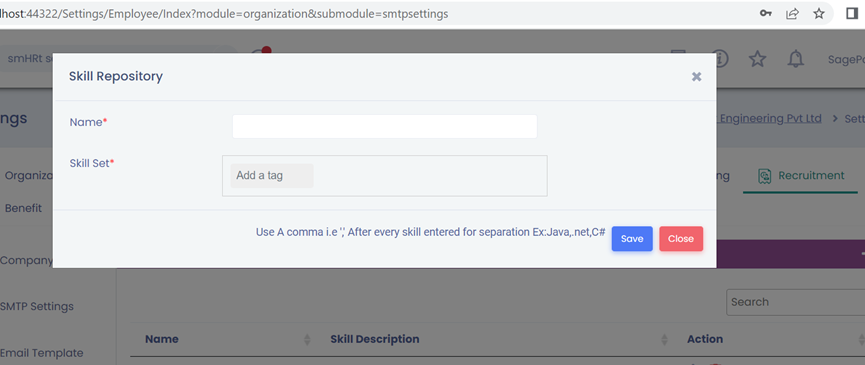
13. Skill Repository
In Pocket HRMS, the skill repository is likely to be a centralized database that stores information about the skills of employees for example HTML, and CSS. The repository may include details such as the employee’s skills. HR managers can use this information to create personalized development plans for each employee and identify skill gaps and areas for improvement.
- To set skills in the job title.
Cloud> Setting>Recruitment> Skill Repository>Add job Name in name > click on ‘+’
- Enter Name and Skill Set
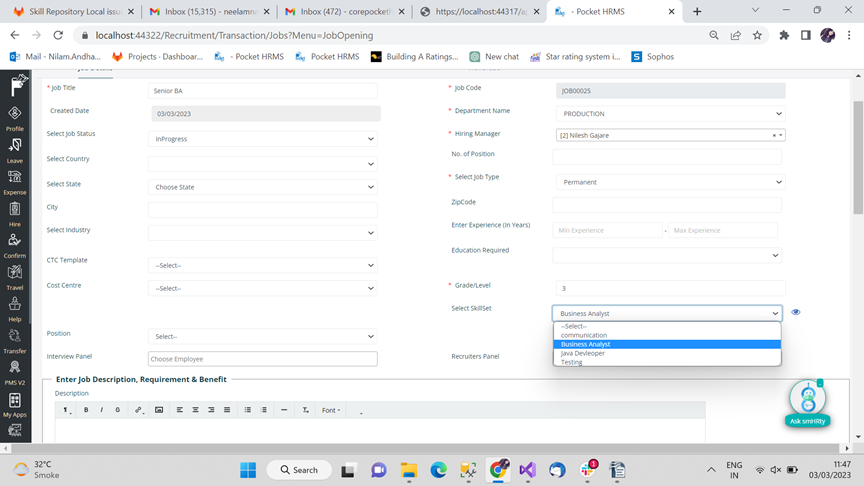
- While creating the job, the user will get the Select Skill dropdown for setting skill to the job as shown below.
Path: ESS> Hire>jobs> job list>Add> Select skill set
- After clicking on the right side of the eye icon the user can find the details of the particular Skill Set
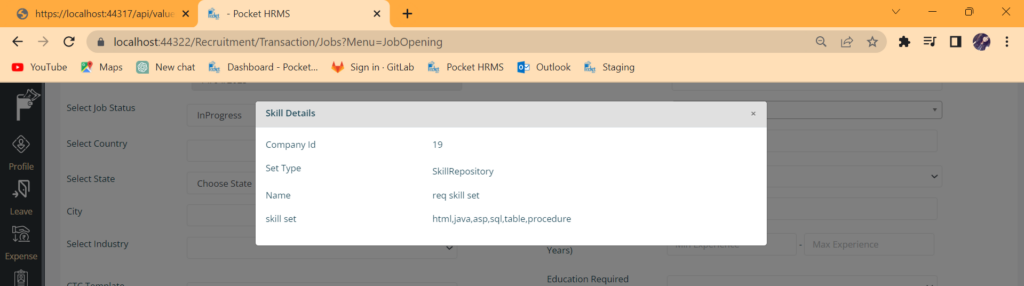
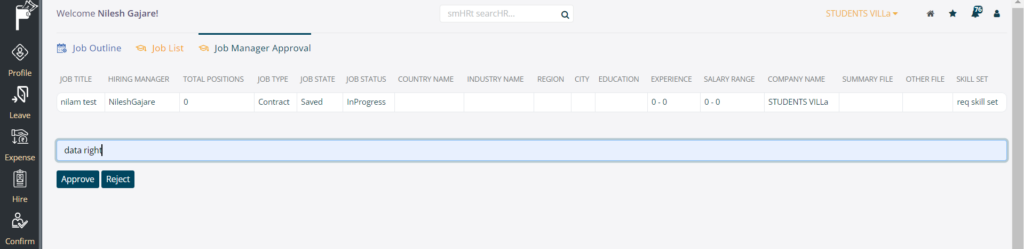
- Managers can approve data with the skill Set
Path: ESS> Hire> Jobs > Job Manager Approval >Detail
- After creating a job user will also receive a mail as shown below screenshot (Manager level 1 and Manager level 2)
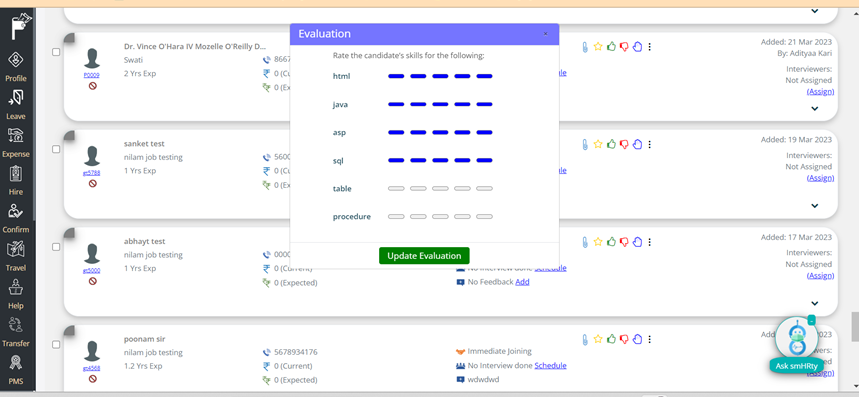
After clicking on Rate, A skill option, the user can rate a candidate as shown below screenshot.
Path: ESS>Hire> Candidate> Candidates> Click on the three dots> Rate a skill
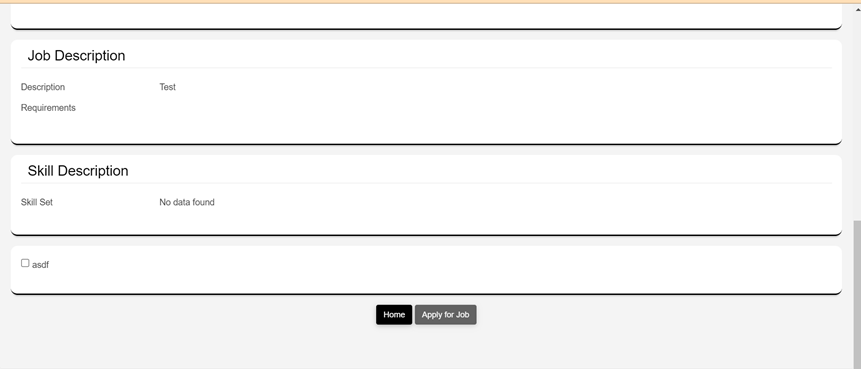
- On the Career page, the User will get the all job details with the Skill Description
Path: ESS> Hire> Jobs> Jobs Outline> Career >View Full Job Description
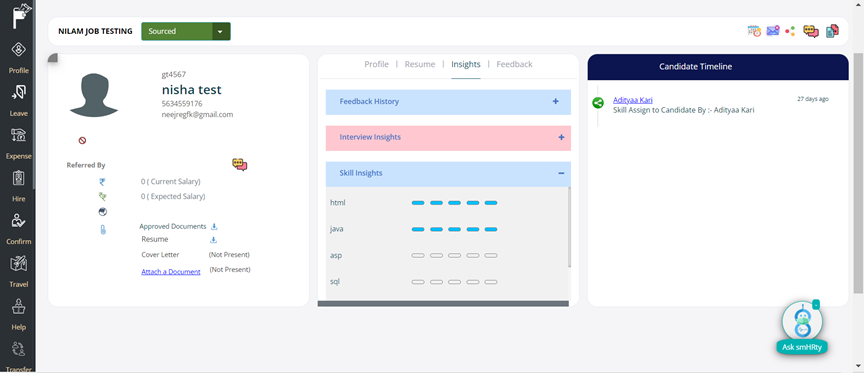
Path: Click on the candidate’s name> Insights tab> Skill Insights
Also, can track the activity record of the candidate in the candidate Timeline
- After onboarding the candidate’s skill details will reflect on a particular employee profile.